There are a few small changes to be made in the settings, but the fundamental functions are the same as a single-entity configuration.
This functionality allows you to match between two entities for duplicate records. Best practice would be to deduplicate in order of Account → Contact → Lead, primarily due to cross table relationships.
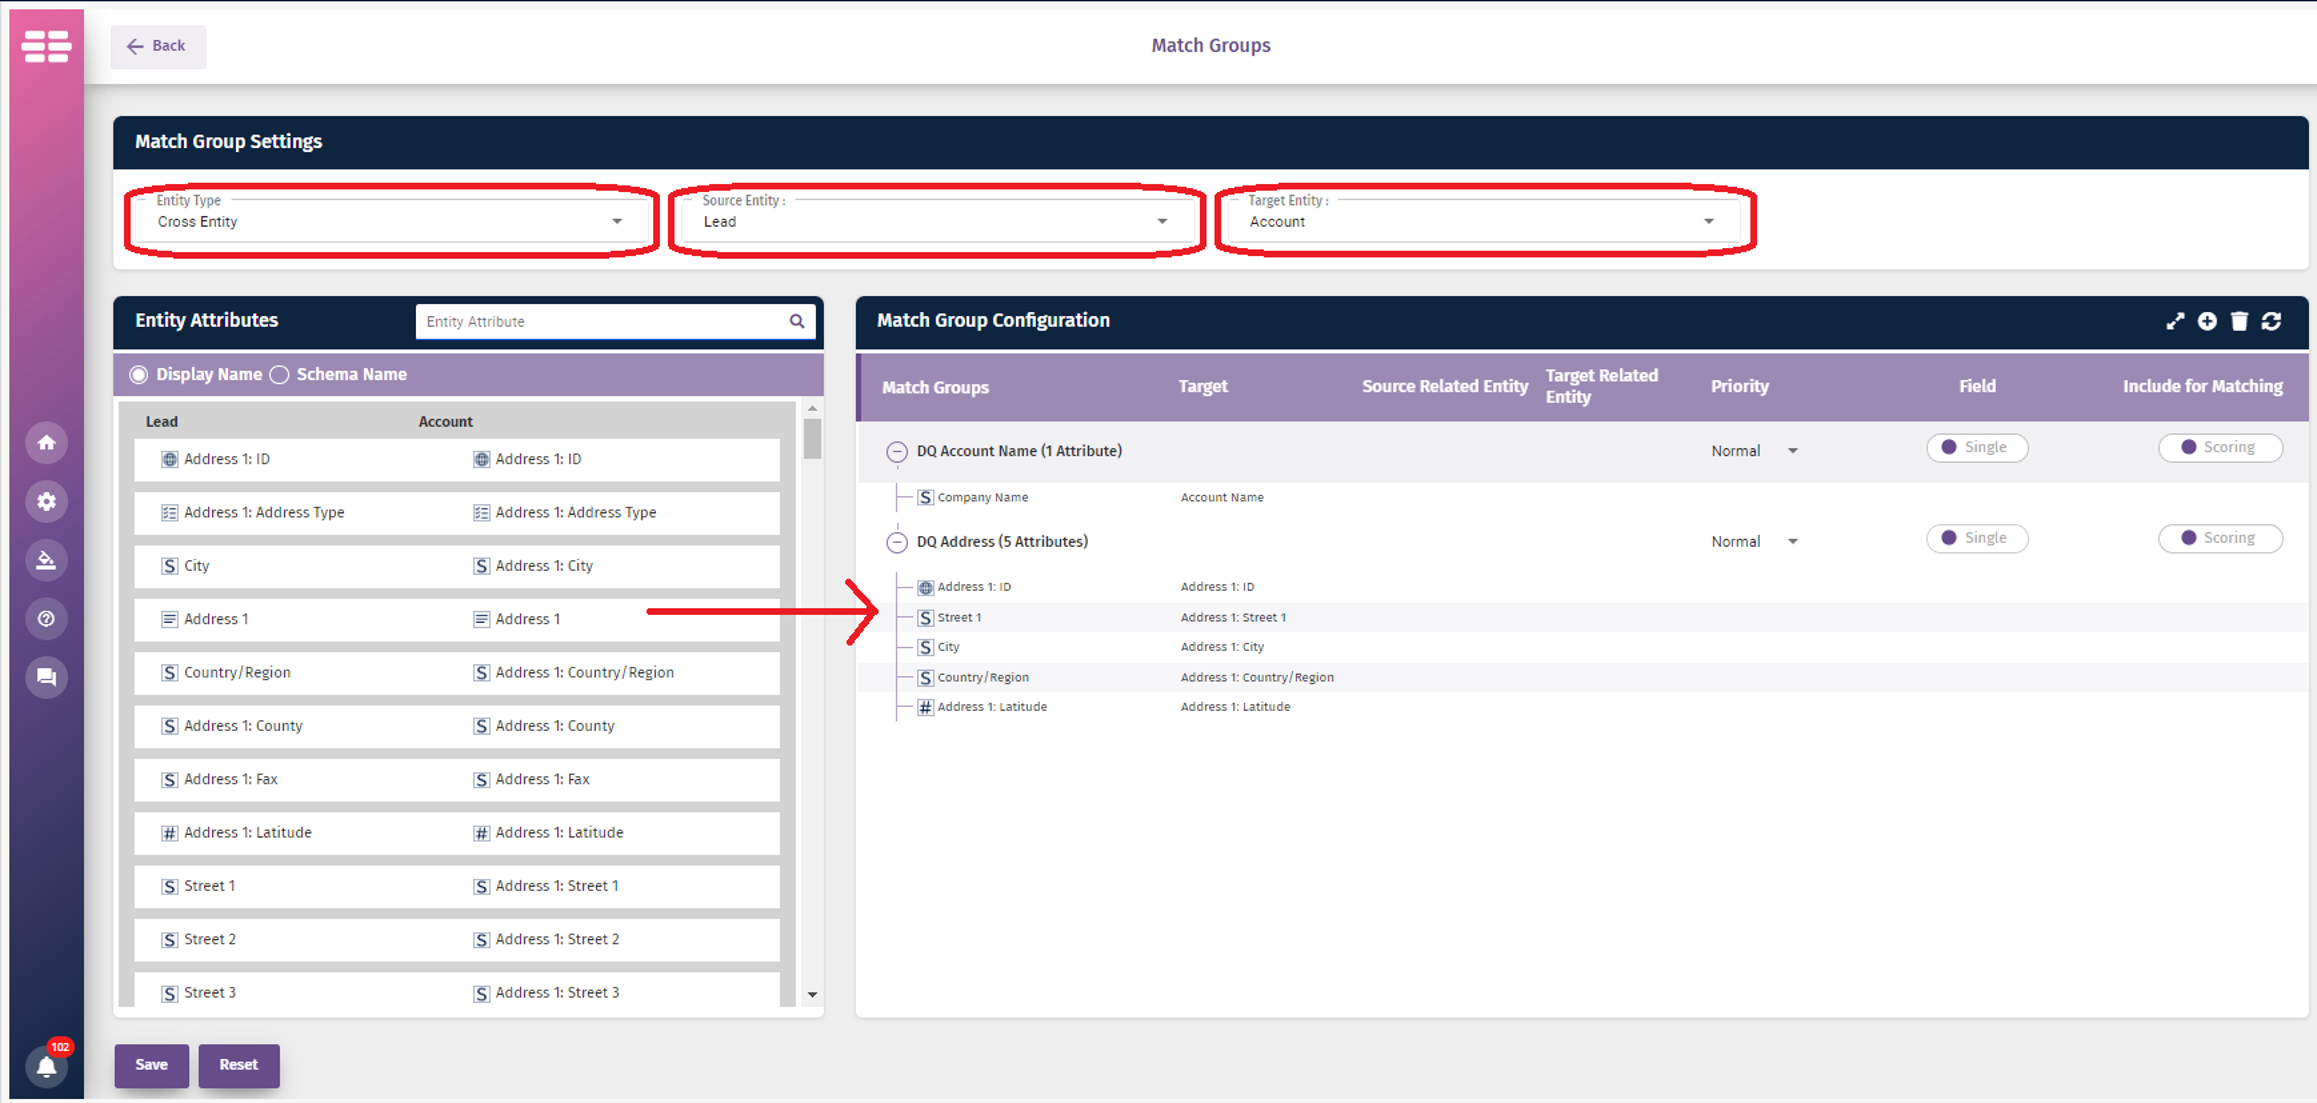
Match Group Settings
Entity Type: For this, select 'Across Entity' from the drop-down.
Source Entity: Select 'Lead' Entity as this will be the entity from which you will be using to check for duplicates in the target entity.
Target Entity: Select either 'Account' or 'Contact' for the entity which you want to use for checking against your source.
In the Entity Attributes, you will now see all fields for the Lead next to all fields from the Account or Contact.
When you come to create a session, you will be shown some extra fields to complete; this is displayed in the screen below:
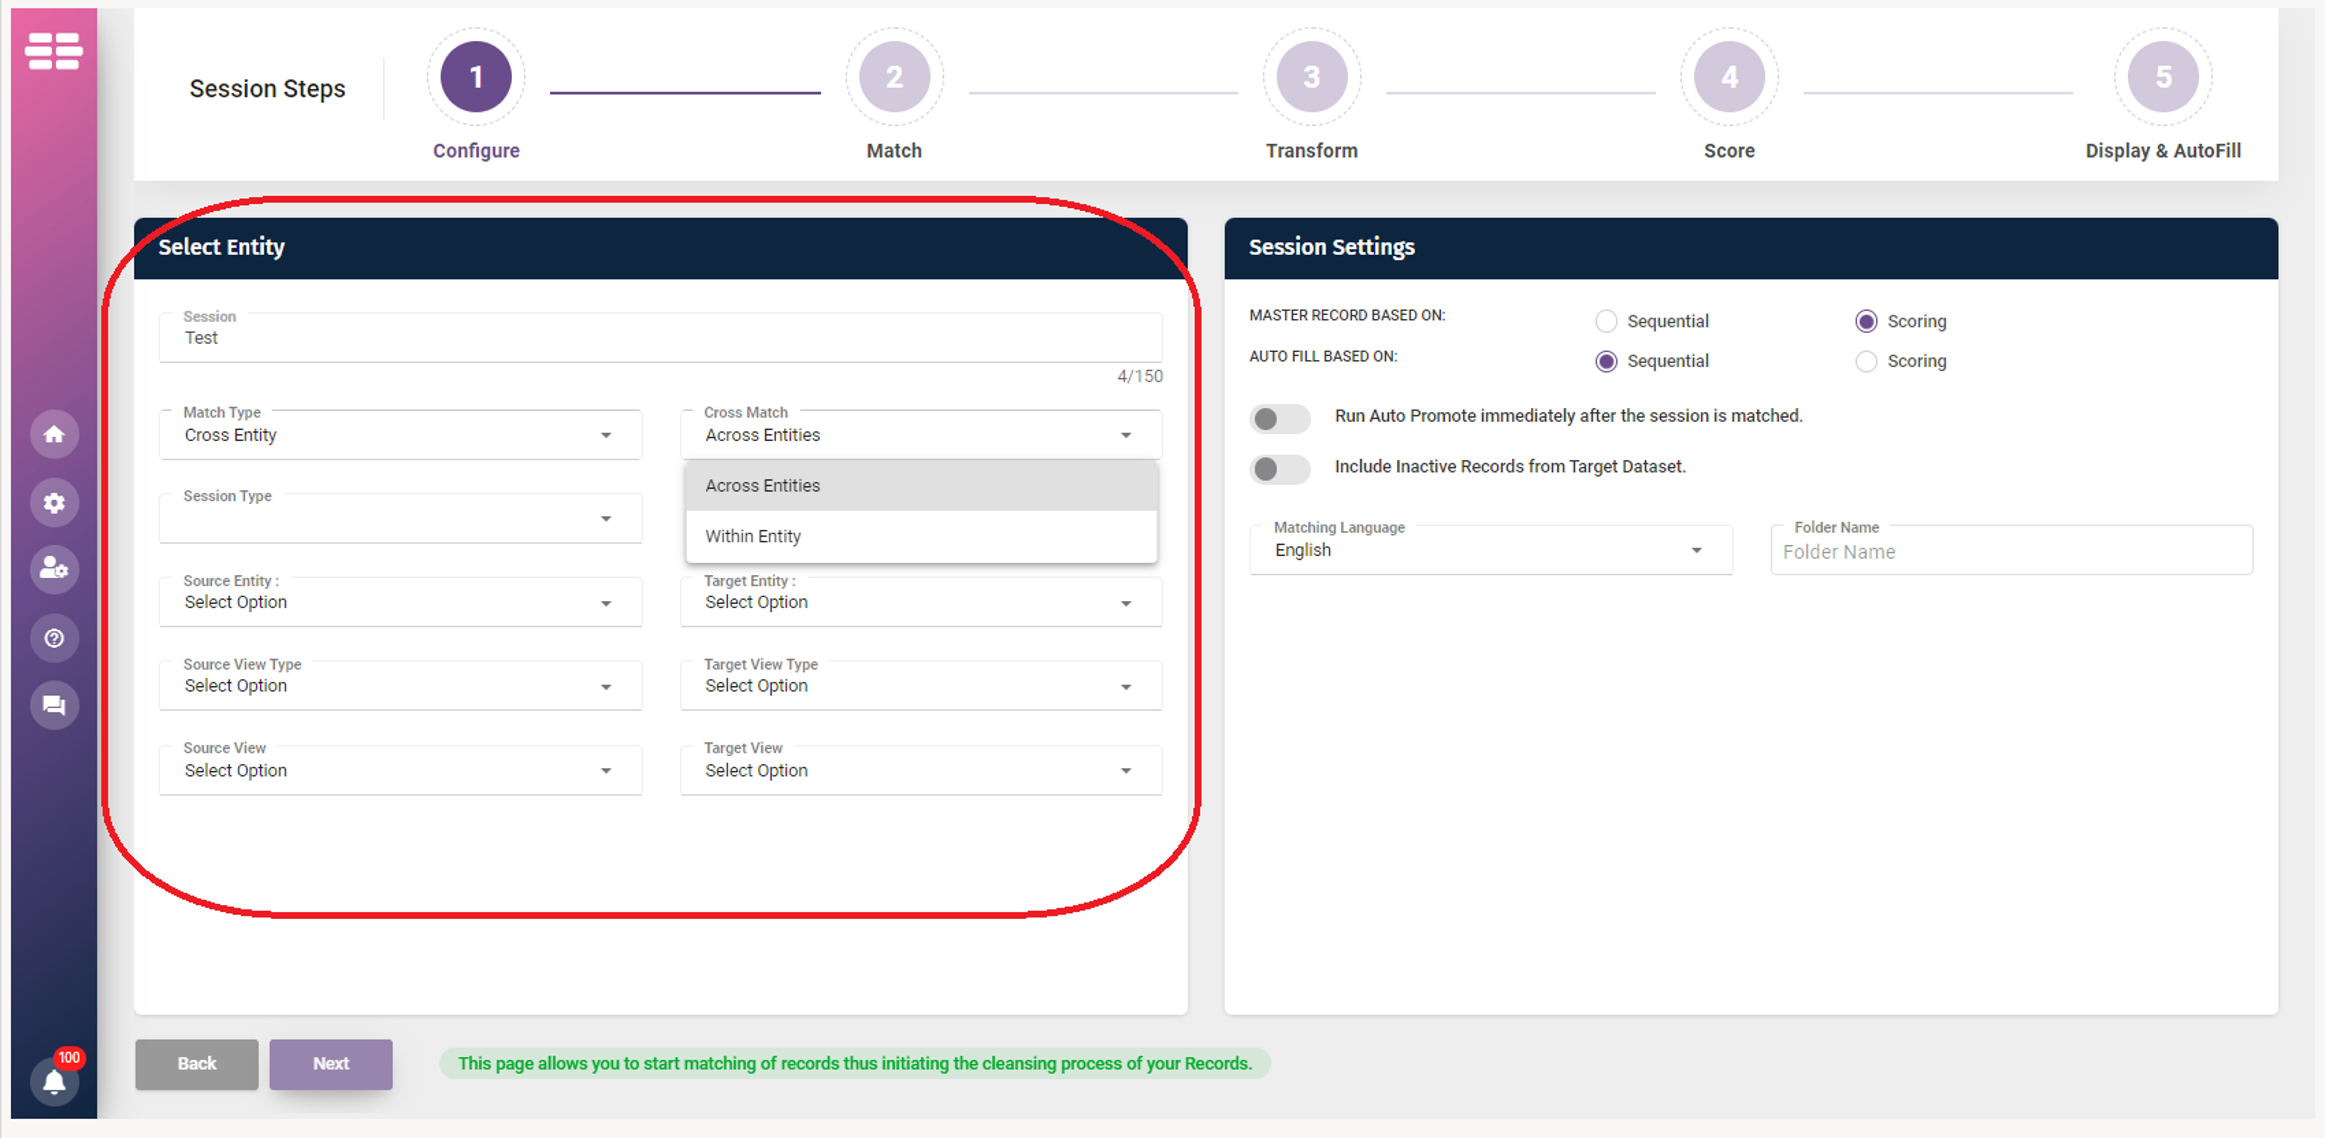
1. Cross Match:
- Across Entity - Compare Records from 2 entities against each other ( I.E Lead → Contact/Account).
- Within Entity - Compare Records from 2 views within the same entity.
2. Source Entity: Select the relevant entity
3. Source View Type: You can now select one of the following view type:
- All Records: If selected, DQ for Dynamics considers all the records from the entity. By default, this option is selected.
- Personal: This will make the session only visible to you, but with the caveat that it can only access data from other personal views that you have created outside of DQ for Dynamics.
- System: This will make the session visible to everyone and give access to System views created outside of DQ for Dynamics.
- Shared: This will make the session available to any groups or teams the 365 User is part of.
- Custom: This allows you to provide you own FetchXML statement to avoid having to create / share / manage views from within Dynamics.
4. Source View: this section allows you to select the data that this session has access to (this is disabled if 'All Records' is selected).
5. Target Entity (Across Entity Only): Select the relevant entity that you want to compare the source entity against.
6. Target View Type: You can select one of the following view types:
- All Records: If selected, DQ for Dynamics considers all the records from the entity for the session. By default, this option is selected.
- Personal: This will make the session only visible to you, but with the caveat that it can only access data from other personal views that you have created outside of DQ for Dynamics.
- System: This will make the session visible to everyone and have access System views created outside of DQ for Dynamics.
- Shared: This will make the session available to any groups or teams the 365 User is part of.
- Custom: This allows you to provide you own FetchXML statement to avoid having to create / share / manage views from within Dynamics.
7. Target View: This is where you can select what data the session has access to (this is disabled if 'All Records' is selected).
After you have selected your desired Entities from Step 1, you will be presented with the screen below:
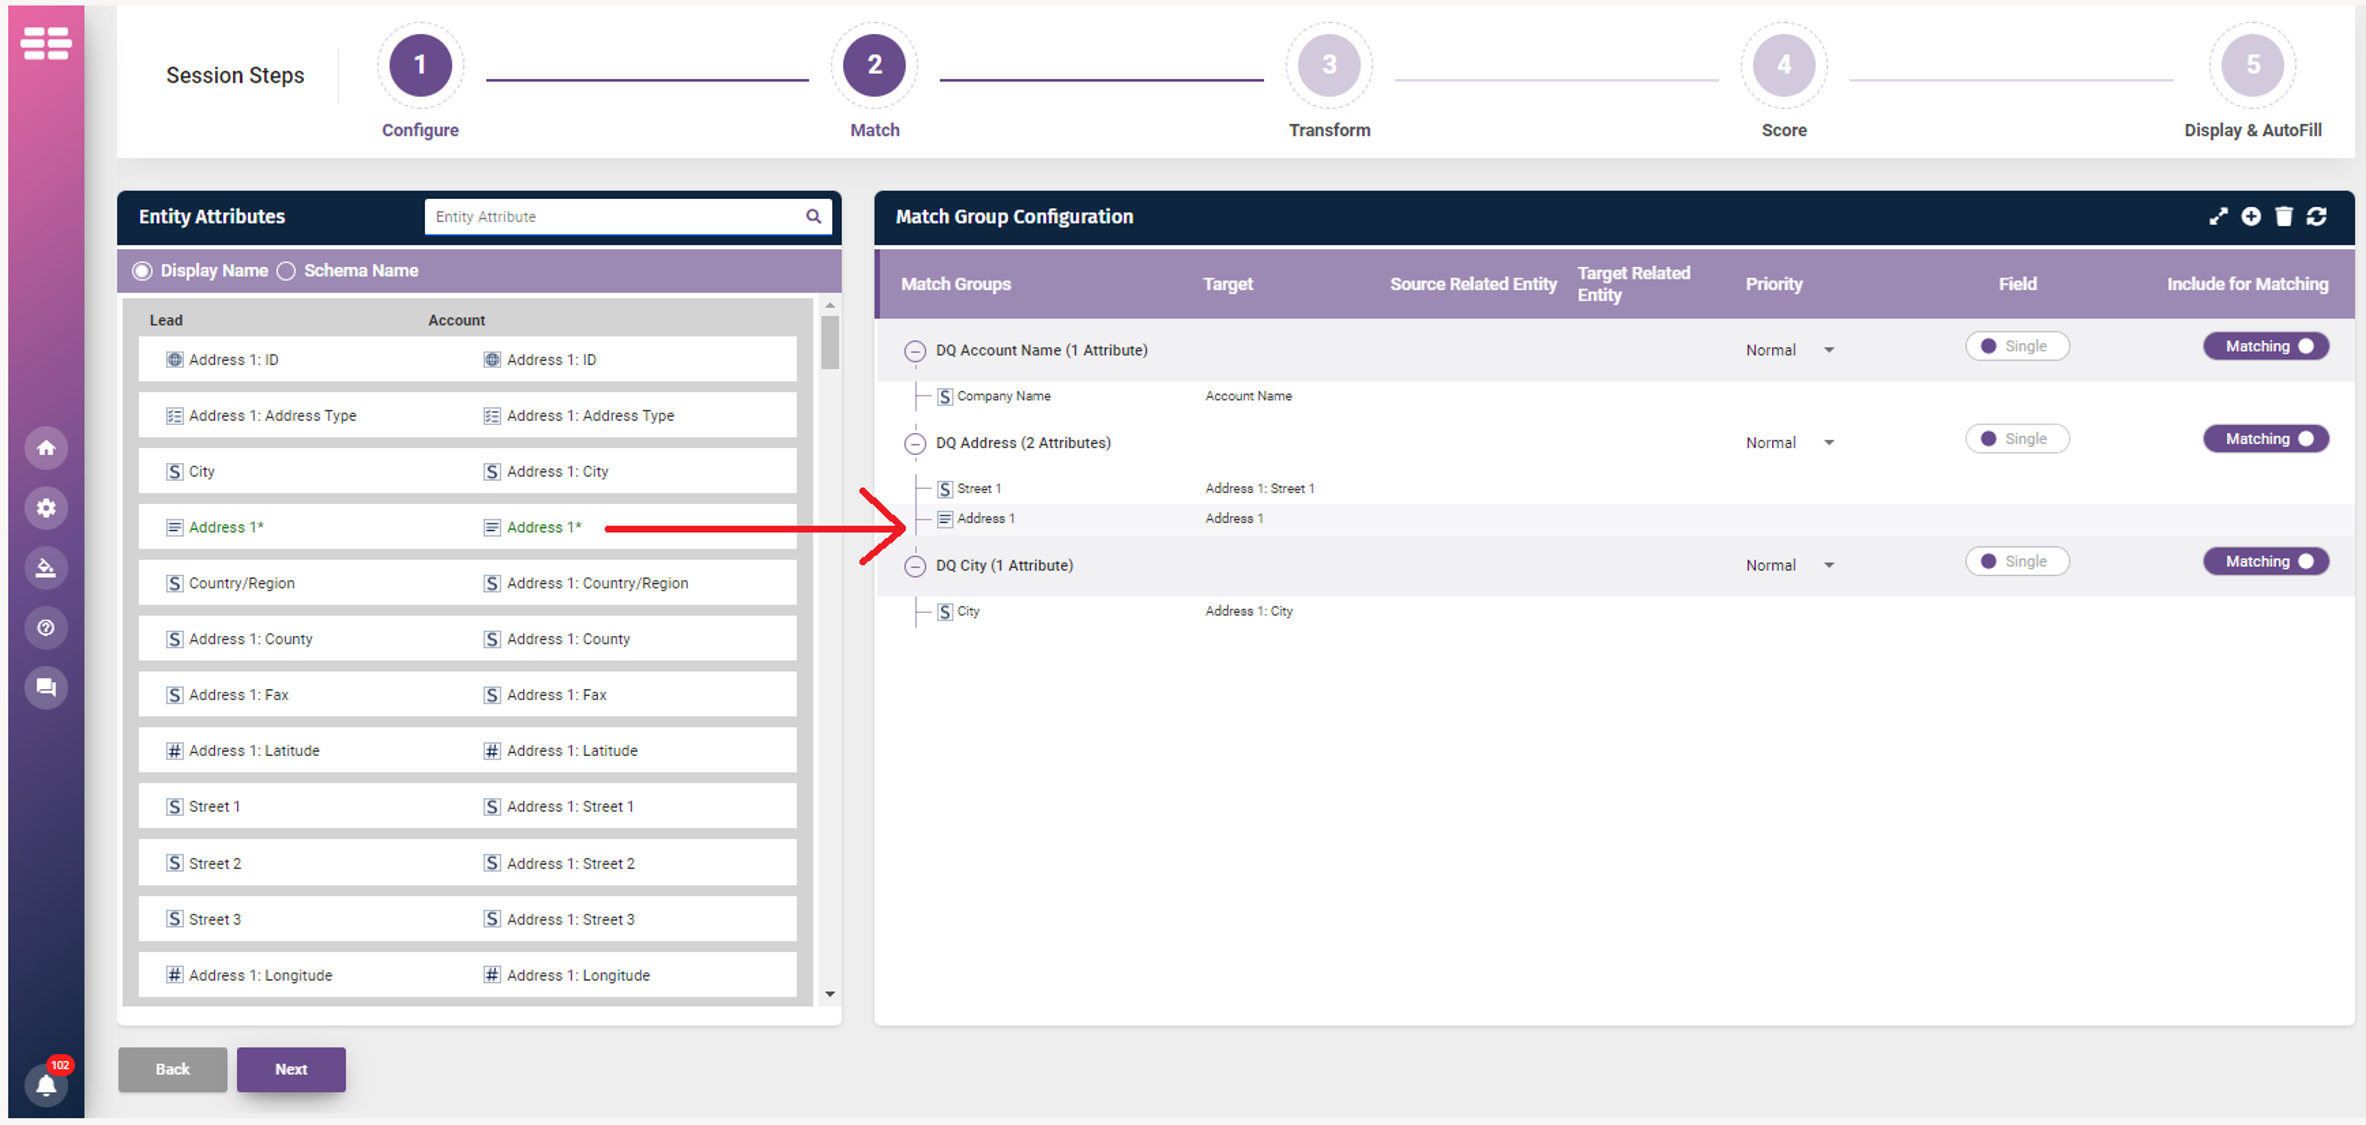
To start the process, you must first go through and assign your related fields from the entities:
E.g. Address1_Country –> Address1_Country (as shown in the screenshot below)
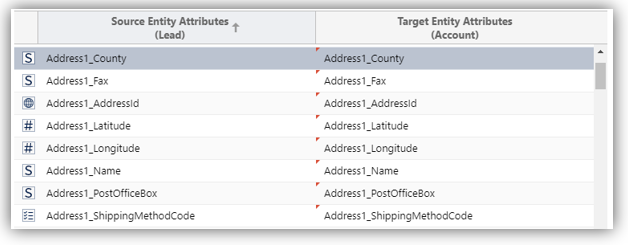
NOTE: Attributes map have already been manually mapped on the Across Entity Mapping Page.
Match Group Transforms Settings
Setting your Match Group Transforms will be the same process as for Single-Entity Matching here.
Display & Auto Fill Settings
When you come to Display & Auto Fill settings:
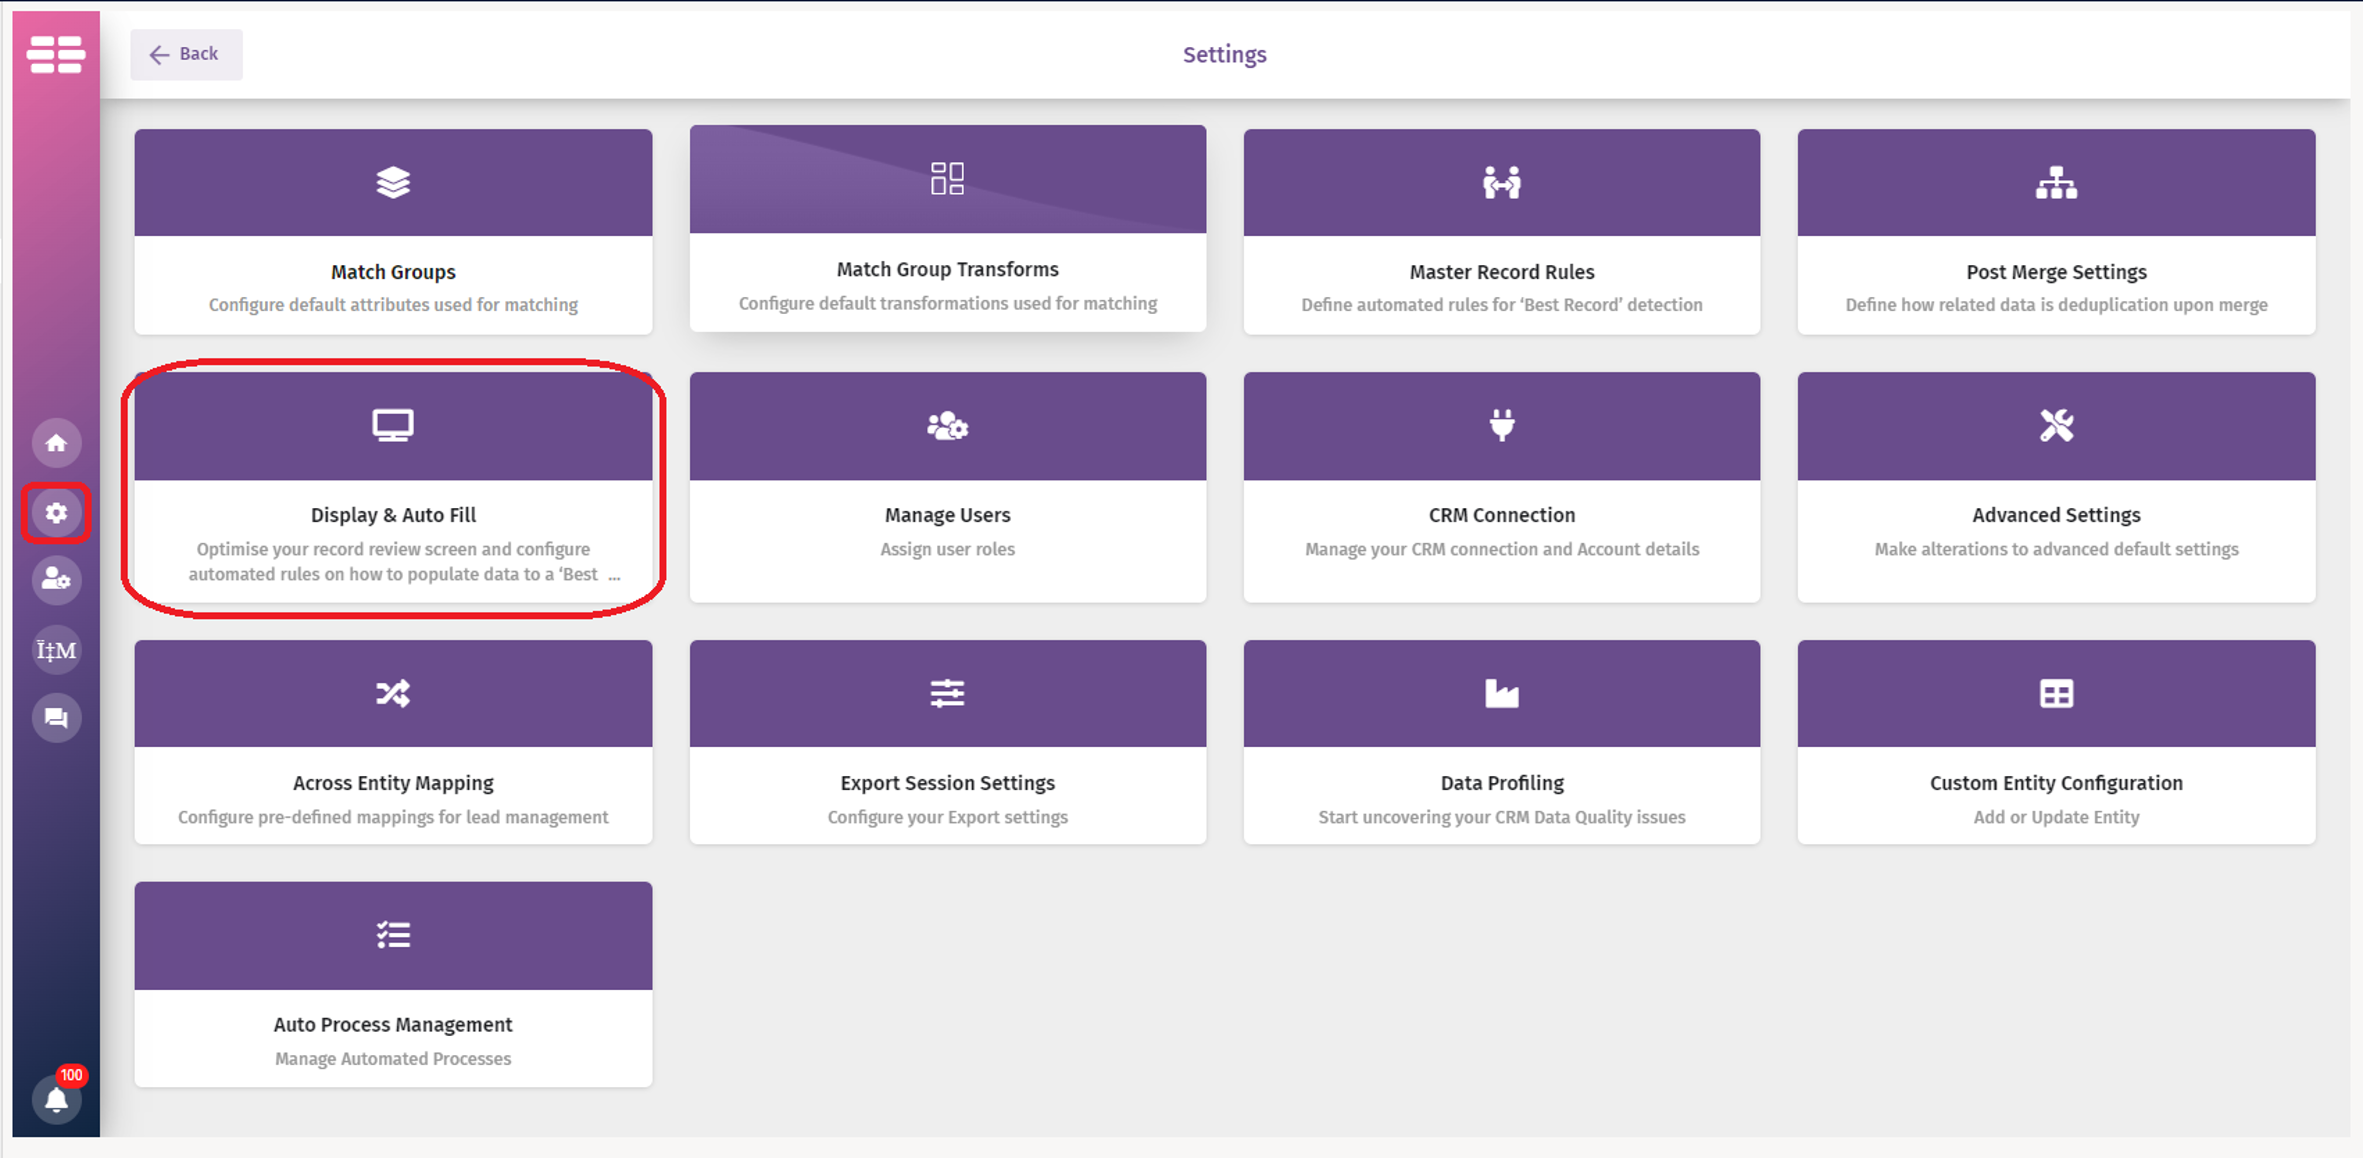
To access the Display & Auto Fill settings screen, click the 'Settings' button, then navigate to the ‘Display & Auto Fill’ tile. You will be directed to the below screen:
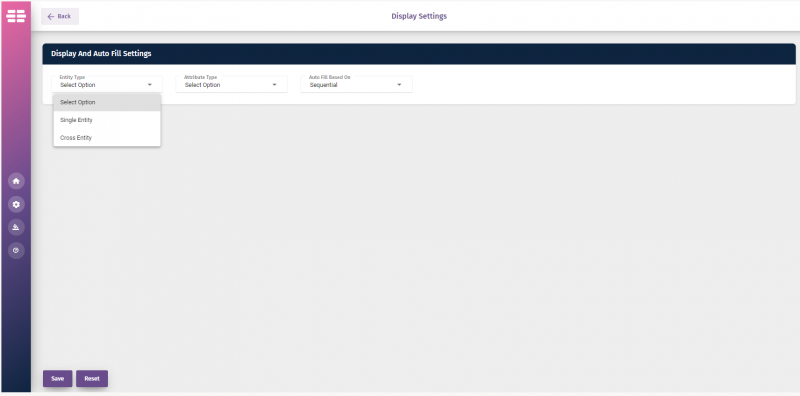
Entity Selection
- Entity Type:
- Single (Account/Contact or Lead)
- Cross (Lead to Contact or Lead to Account)
Entity Type: For this, select 'Across Entity' from the drop-down.
Source Entity: Select 'Lead' Entity, as this will be the entity from which you will be checking for duplicates against the 'Target Entity'.
Target Entity: Select either 'Account' or 'Contact' for the entity which you want to use for checking against your 'Lead' source.

Entity Reference: There are three options:
- Name: Display the data from found duplicate.
- ID: Display the ID of the found duplicate.
- Both: Display both.
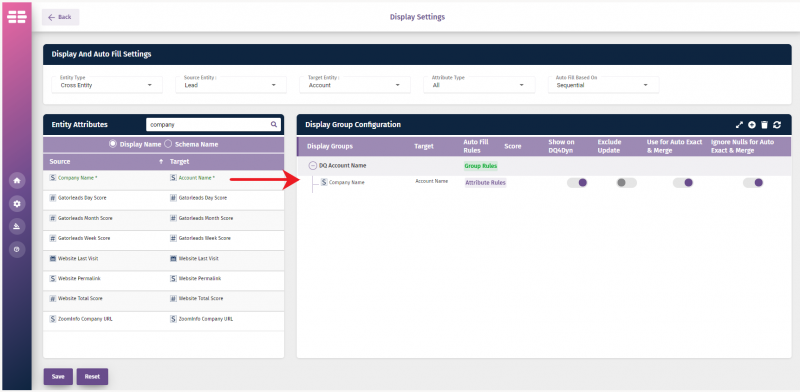
Now you will be able to select attributes for the Across Entity match.
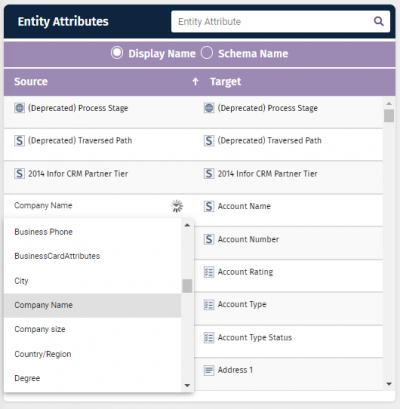
Your pre-mapped fields will be shown on the left-hand side of the page. To alter the mapping for this match session, double click on the attribute name and you will get a list of dropdown values to select. This will look like this:
Drag and drop into a folder, the same way you would for a cross-entity session.
Session Review
You would review Groups in the same way as with single entities here.
However, the review screen will list the prospective Lead record for you together with all the duplicates, from the selected group, against the Master Record.
By now you should have deduplicated all Leads and all Contacts. Once you run the cross entity matching, you will find the best relationship.
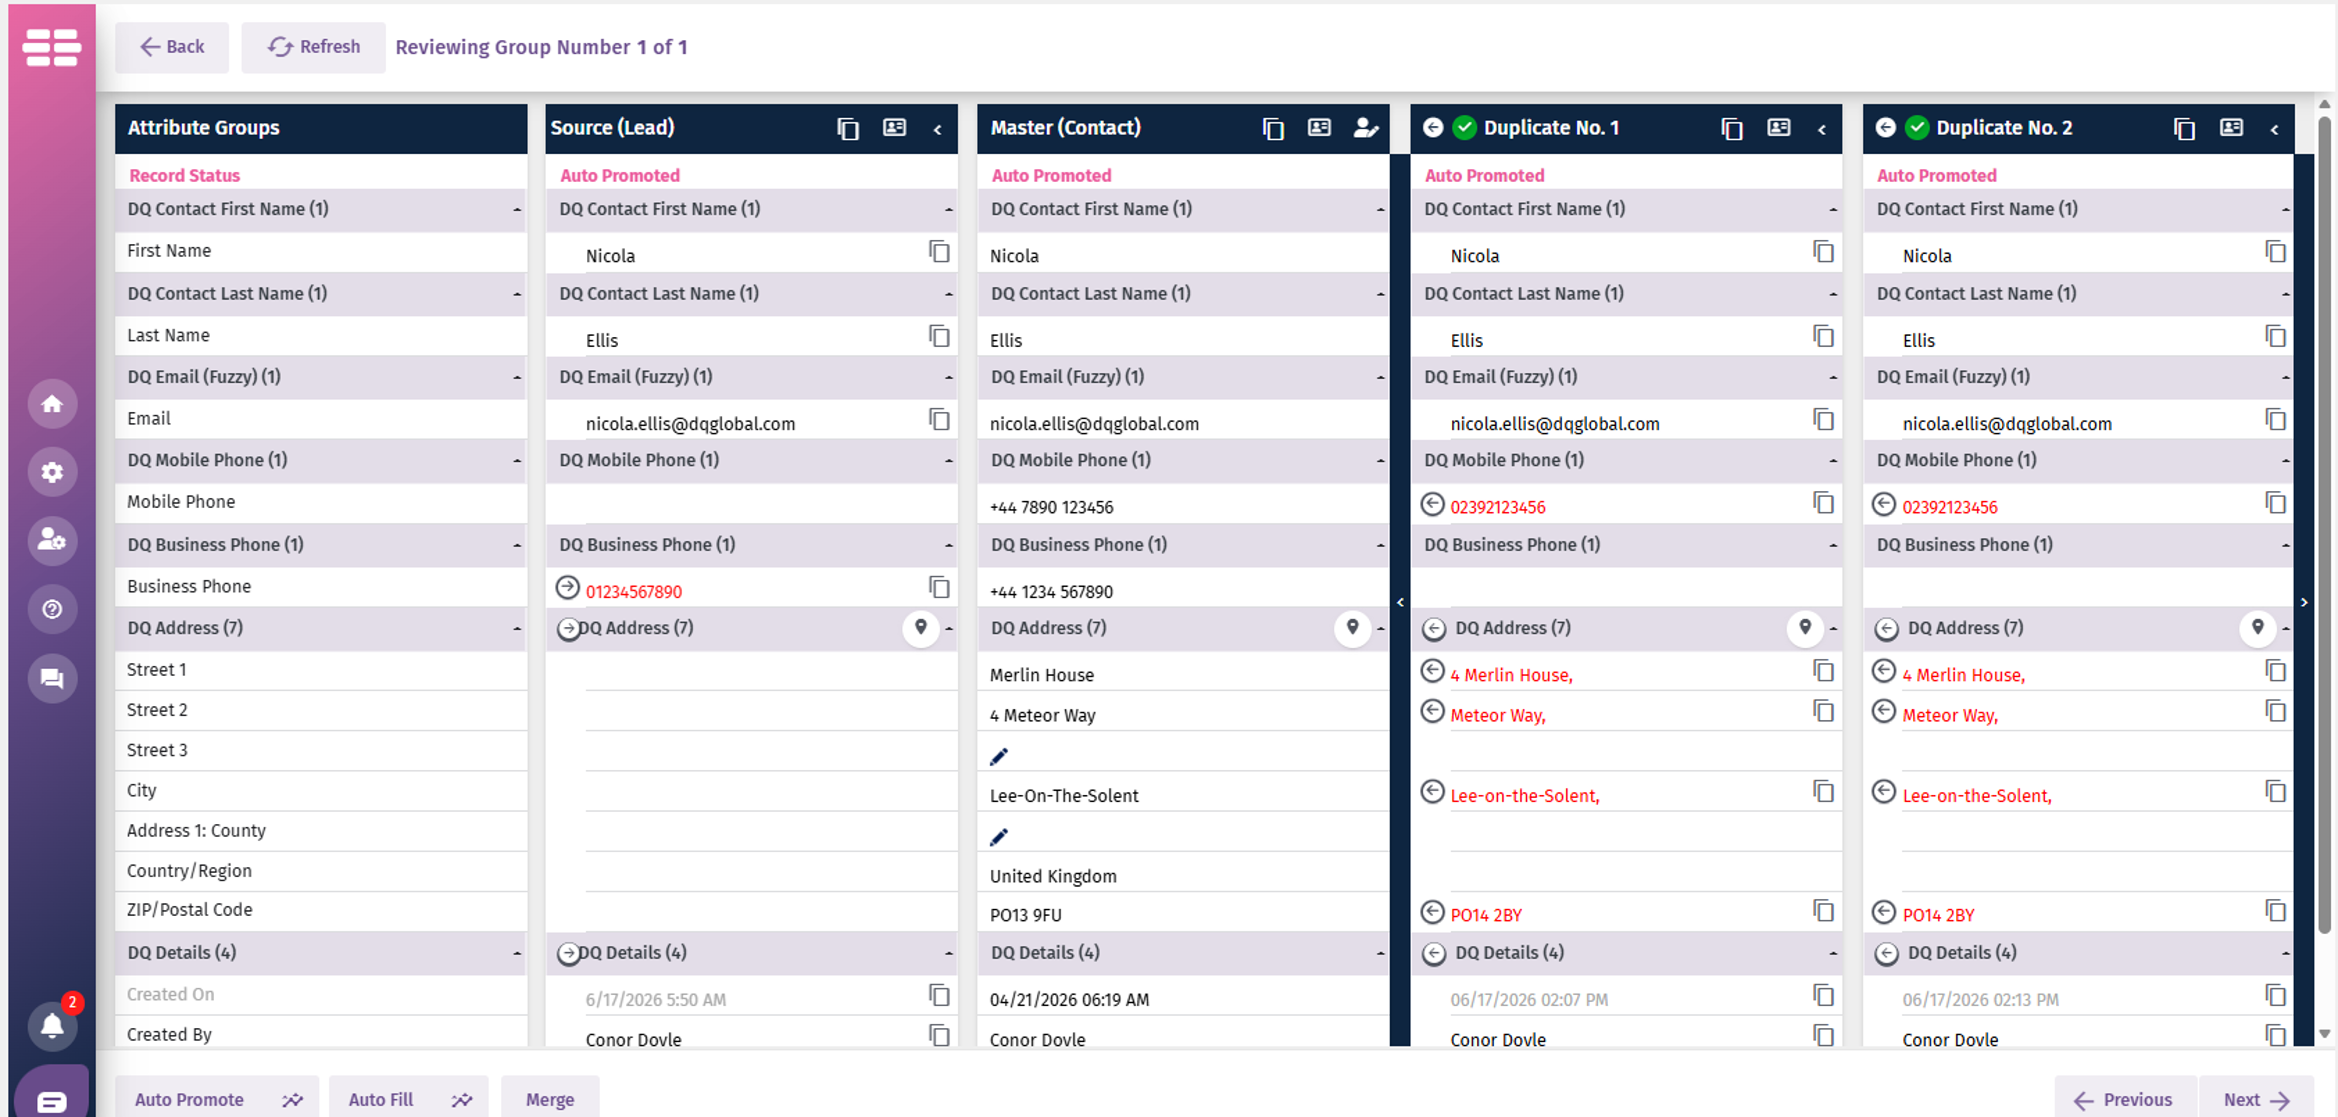
Note: You can manually change or add into any of the data in the master record simply by double clicking the field you wish to change.
Note: The arrow next to each field lets you push that data value into the Master Record.
When you complete the merge. The Lead will be qualified and attached to the Master Contact.
Was this article helpful?
That’s Great!
Thank you for your feedback
Sorry! We couldn't be helpful
Thank you for your feedback
Feedback sent
We appreciate your effort and will try to fix the article